воскресенье, 10 ноября 2013 г.

Sunday Shree Lakshmi Pooja with unexpected Guest appearing!!!!!!!!!


I have dreamt about offering raw lump sugar to Shreemati Lakshmi-Devi and today I have made the pooja with raw sugar only!

For this very special pooja the following items have been bought by me today:


1) A special plate with hearts and roses (yes, I can't hide the fact, that I am in crazy love with Para Ishvari Lakshmi).

Actually, I have been searching for the plate like this and my main fear was that all the stores will be packed up only with usual boring plates for soups and salads.

So, I was insanely glad to find this plate, which is called "a plate for olives" (as you can see a small fork is also attached to the plate).

Nor Shreemati Lakshmi Devi, neither me eats olives, but this plate is very good for offering sugar, confectionery, fruits and other items.


2) Now the orb for the candles. This orb is of very special pride of mine. It was in the same shop, as the plate. I have seen it and understood, that I must buy it for my Precious Para Ishwari!!!!!!!!!!!!!!!!!!

This orb will also participate in all the evening poojas this week.


3) Lemon candles (at first I was thinking about red candles, but then decided, that yellow ones would not deconstruct the colour palette of the pooja, as the red ones would do!).


4) Raw lump sugar (in the box behind the plate and on the plate on the subsequent photos).

So, the Pooja looked like this (Krishna will appear on the photos, though He was not invited actually due to His very, very nasty and bad behaviour in the last 3 months - maybe, I will tell about it later). 


Krishna on the photos is from my other Pooja Room (I have Other Murtis also, but usually I don't show Them)!

See the Gallery on dropbox, minus, flickr, box

Blog freeze till January, 2014 (possibly)

20:58, 10th of November, 2013

I suppose, no posts will be published by me till the end of the year. 

The first reason is the emphazis on sadhana and the lack of time. 

The second one is that I need time to sort out the Sanskrit Books, I am going to upload!

I also would like to transliterate more Stotras, so all this will gobble up the time. 

Still, if I visit Indian Shop in Moscow till the end of the year, I will publish a post with the list of items bought (I would like to buy the Murtis of Shreemati Lakshmi-Devi and Bhagavan Shree Narayana, Which I have seen in this shop about 3 years ago). 

And I am dreaming about buying the sphatik and lotus beads in this year. Sphatik beads - http://blog.religiousproductsonline.com/2012/08/31/benefits-of-wearing-sphatik-mala/

воскресенье, 3 ноября 2013 г.

Shree Lakshmi Pada Rangoli from the dried fruits in brown-white-yellow palette


I have decided to make food Rangoli today!

Everyone can make Rangoli such this, because all the ingredients can be purchased in the European shops (as I am in Russia, standard Indian ingredients are burdensome to obtain).

Before I have started the creation of the Rangoli, I have decided, that it would be in:

1. Noble brown-white-yellow palette

2. Based on dried fruits

3. And turned into classic pudding after Diwali!

As you see everything is very practical!

Ingredients: 
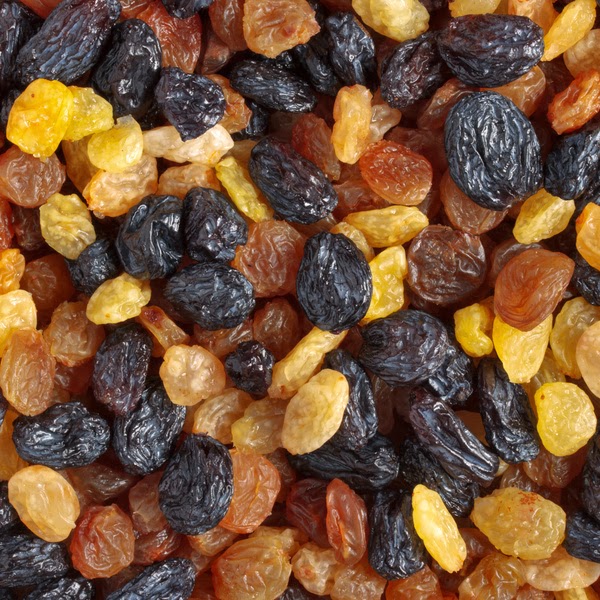
1. Raisins (don't forget to wash)
2. Date-palm dried fruits (necessary to wash also and, as a Gopi to Gopi I will tell: they are NOT the fruits from the palm under which you are dating and kissing with Krishna, HAHAHAHAHAHA!)
3. Coffee grinder (for grinding rice and brown sugar)
4. For white base 01 - Rice grinded in the coffee grinder (or you can just buy rice powder, but rice powder is a rarity in Russian supermarkets).
5. For white base 02 - Brown sugar grinded in the coffee grinder (when you grind the brown sugar, it will turn into white sugar powder)
6. Raw rice (yellow-coloured with turmeric)
7. Turmeric (for making raw rice yellow-coloured). The yellow rice is very easy to get: you just need to add some water to cellophane package and add some turmeric mixed with raw rice to the water.

Leave the package for a night and by the morning you will have yellow-coloured rice. Then it is better either to dry it up in the wind or just fry in the pancake.
8. Tangerine
9. Cinnamon (for making sandy "puddles")
10. Tea candles
11. Almonds (raw originally, but I have washed them and fried, because I don't trust the commercially fried nuts, as I don't know on which butter - animal or not -  and in which conditions they are being fried).

By the way, Mark Almond is very popular in Russia (that's why "In October 2009, Almond released his second album of Russian Romances and Gypsy songs"...), especially, among the elite (and the reason why is the riddle!).

12. Wooden tray. Simple, square one (don't get obsessed with complicated forms, because we need it only as a base for Shree Lakshmi Rangoli creation). The size should be big too, otherwise, it will be difficult to fit the Rangoli composition, that is if the tray is small, you will be able to draw only one microscopic swastika with lonely tangerine.

The ever-existing rule for Rangoli is simple: more space you use, more decent Rangoli will be drawn!


As you see on the Image, the Rangoli consists of: 

1. Lotus Feet of Shreemati Lakshmi Devi (made of almond and raisins).

2. Swastika (made of yellow rice).

3. Margins (made of raisins and date-palm dried fruits).

4. Brown "muddles" from cinnamon.

5. Base made from grinded rice and grinded brown sugar.

Practically everyone can create his / her own design, be creative!

Now the Photo Gallery, which also can be found on minus, dropbox, box, ge.tt, cubby, skydrive and my flickr.


суббота, 2 ноября 2013 г.

Rangoli - Part 04 - Tracing and Inking the Black-and-White Design of Rangoli

This Article consists of 4 Parts:

01. Rangoli - Part 01 - Shree Lakshmi Rangoli Pada - 12 Designs and natural colours for Rangoli - link

02. Rangoli - Part 02 - 40 Ideas for Diwali (with only about 5 viable in reality) - link

03. Rangoli - Part 03 - Making your own Black-and-White Draft of Rangoli with Invert and Colour Replace in Photoshop - link

04. Rangoli - Part 04 - Tracing and Inking the Black-and-White Design of Rangoli - link


In the previous post the preparement of the Design in the Photoshop has been discussed.

Now it is the time to print the Rangoli out and to trace and ink it!


For this I will use:

1. Comix Pad

2. Colour pens (with glitter and aroma!)

3. 2 capillar ink pens.

4. Rangoli Draft, of course

5. Strong light (powerful desk lamp) will be also necessary, because it is difficult to trace the image in poor lighting.

The Draft is fixed on a Comix pad

A new, white list is fixed over Rangoli Draft and the tracing starts. 

Half of the tracing. 

The Rangoli is ready!
One may ask: "Why there is no NAME "SHREE LAKSHMI" on the Rangoli and why the Feet are multicoloured (One is Pink and the Other One is Blue?)"

The answer is simple: "I have decided to write on Rangoli my favourite Mantras from "108 Names of Shreemati Lakshmi-Devi" in Sanskrit!". 

You can also make the replacement you cherish: 

for example, at first I wanted just to write 2 Mantras of Shreemati Maha-Lakshmi-Devi on the Rangoli, but then I have decided, that Mantras from "108 Names of Shreemati Lakshmi-Devi" would be very suitable for Dipawali!

As for the diverse colour of the Feet, I have decided that one Image must be devoted to Bhagavan Shree Narayana (the Blue One) and the Other Image - to Shreemati Maha Lakshmi-Devi, because Shreemati Lakshmi Devi hates to be without Bhagavan Shree Narayana. 

As you see the Feet are of diverse size too, but it is my mistake, as I have made a blunder, while tracing, but I have decided not to correct, being afraid of blurred inking!

Rangoli - Part 03 - Making your own Black-and-White Draft of Rangoli with Invert and Colour Replace in Photoshop

This Article consists of 4 Parts:

01. Rangoli - Part 01 - Shree Lakshmi Rangoli Pada - 12 Designs and natural colours for Rangoli - link

02. Rangoli - Part 02 - 40 Ideas for Diwali (with only about 5 viable in reality) - link

03. Rangoli - Part 03 - Making your own Black-and-White Draft of Rangoli with Invert and Colour Replace in Photoshop - link

04. Rangoli - Part 04 - Tracing and Inking the Black-and-White Design of Rangoli - link


IF YOU DON'T KNOW PHOTOSHOP, YOU CAN SKIP THIS PART AND DOWNLOAD 2 READY DRAFT(SEE FILES "PRINT_and_INK....."):

Dropbox  Box  Cubby  Ge.tt Yandex  Skydrive

In this post I will turn the Rangoli Design NO. 04 from the post about 12 Designs of Rangoli (it was here) into Black-and-White. 

Why I am doing this? 

Because I want to print this Rangoli out and to trace and ink it out on a paper with colour pens! In order to implement this, I need just B\W draft of the Rangoli (I will show how I am inking the Rangoli in the next post). 


STEP 01. The png-file must be opened in Photoshop. We will need only left, upper square (under the name "Step 4"). What I need to do right now is to copy this square to A4 landscape list and to stretch it to fit it into such list.


STEP 02. Edit - Copy.


STEP 03. Now the A4 list must be created. File - New and in the menu appeared chose "PRESET - INTERNATIONAL PAPER - A4" and other parametres like on the picture above (with DPI 160)


STEP 04. A4 list is ready, but you need to turn it 90 degrees clockwise in order to make it "Landscape".


STEP 05. Image - Image Rotation - 90CW


STEP 06. Now paste the Square NO. 04 into the Landscape list (just press CTRL+V).


STEP 07. Now it is necessary to stretch the Square and to fit it in A4 Landscape list. Use CTRL+T (or "EDIT - FREE TRANSFORM") and use the nods in order to stretch and fit.


STEP 08. I have stretched the Square in the following way. Don't forget to press ENTER or "MOVE TOOL" icon after you have stretched the Squre).


STEP 09. What I really need is just white background and black Rangoli (but as you see the background is violet and Rangoli is white). This problem is easy to solve out: just use "INVERT", that is "IMAGE - ADJUSTMENTS - INVERT".


STEP 10. OK, the Image is inverted now. The black Rangoli is ready, but the background is green now. The green background is very easy to remove, using "COLOUR REPLACE", that "IMAGE - ADJUSTMENTS - REPLACE COLOUR".


STEP 11. In "REPLACE COLOUR" menu, on the top you should point the colour you want to replace and in the bottom the colour that will live instead the replaced colour (so as you see, on the top there is green and white in the bottom).

Sometimes after such the replacement, the colour may look to pale or in grey hue. To amend this use "FUZINESS" and "LIGHTNESS".

As you see on the picture above, I have changed both these parametres.

So, the Image is ready now. Just save it either in BMP or PNG and print it out!

In the next post I will show how I have inked the Image with colour pens - http://vishnudut1926.blogspot.com/2013/11/rangoli-part-04-tracing-and-inking.html